Showing posts with label recipes. Show all posts

Thursday, October 8, 2026

Carole’s Golden Corn Bread

I recently mentioned that I’m in the midst of a long-term project of transcribing, organizing, and annotating the recipes of my people—in a broad sense: from family, elders, friends, and from midcentury potluck recipes, church-lady recipes, recipes in well-worn cookbooks, marked with stars and garnished with splatters. Recipes scrawled on the backs of envelopes; recipes passed among friends and passed down through generations. Recipes on tan, antique paper, with the edges crumbling away. It’s my own way of passing them along.

The present recipe is one from my aunt Carole Schroeder’s collection. It’s one of four cornbread formulas I’ve accumulated (so far). I recently shared my grandma Renner’s cornbread recipe.

Carole’s recipe card, which I photographed, is in her husband, Richard’s handwriting: it was probably a big favorite of his. Aunt Carole had put the card into a plastic sleeve to protect it. Probably, it was a favorite of the whole family!

Aunt Carole is a master of fantastic soups. Often when we’d visit, she’d serve bowls of delicious homemade soup, plus all sorts of lovely nibbles alongside: crackers, bits of cheese or a spread, like her homemade hummus or pesto, plus fruits and veggies. She’d make these soups “by feel,” using what she had on hand. For example, she’d make a chicken soup inspired by southeast Asian flavors (I’m thinking lime and ginger), with vegetables and some cilantro from her garden.

This cornbread would be especially good beside bowls of chili, bean soup, split pea soup, or lentil soup. These days, I enjoy cornbread with breakfast: fried eggs, bacon or ham, or cooked tomatoes, or cooked greens.

This is a perfect straight-up cornbread. It strikes a balance between the southern and northern styles. It is not especially sweet, fluffy, and cakelike, but neither is it dense and entirely lacking in sweetness.

When you are evaluating cornbread recipes, look for ratios of flour to cornmeal, and the amount of sugar. “Northern” recipes use ample flour and sugar, producing a tender, cakelike bread that almost falls apart—lovely in its own way. “Southern” recipes, with proportionately more cornmeal, are much denser, approaching polenta, with only enough added sugar to ensure the sweetness of the cornmeal comes through. They are hearty and perfect for crumbling onto your plate and ladling soup beans and cooked greens, and their delicious juices onto.

I think this cornbread is what Jiffy cornbread mix would be like if it backed down on the sweetening and the factory ingredients, and if it was moister and tasted more purely of cornmeal. What’s not to like?

Provenance: Knowing that Aunt Carole used the Better Homes and Gardens Cook Book (revised edition, 22d printing of the De Luxe Edition), I looked it up in my copy of that edition (the 11th printing, inherited from Grandma Schroeder), and there it is exactly: chapter 6, page 16, right above the recipe for “Southern Spoon Bread” and below the one for “Blueberry Buckle.”

So this is not some original, heirloom recipe that was passed down in Carole’s family, unless her mom had the cookbook (which is a real possibility; Grandma Schroeder, of Mrs. Schreen’s same vintage, had the book). To say that the Better Homes and Gardens De Luxe edition served generations of American cooks is a massive understatement. Those recipes are still being used today . . . as in this case.

Reflecting on recipes like this . . . so, it’s from a book, but it’s a classic worth passing along. Put a star by it. Its ease of preparation frees up mental space for more creative dishes, like Carole’s wonderful, creative soups, or a perfect pot of chili.

My only tips are that I use a Pyrex dish, and I just spray it with Pam instead of fussily lining it with waxed paper. I like larger hunks of cornbread, so for me it makes nine pieces, not sixteen. Also, my antique oven runs hot, so I set it slightly lower, at 375°, and start checking it at 12 minutes. (You know . . . experience; know your oven.)

  • 1 cup flour
  • 1 t. salt
  • 3 t. baking powder
  • 2 T. sugar
  • ¾ c. yellow corn meal
  • 2 well beaten eggs
  • 1 cup milk
  • ¼ cup melted shortening

Sift flour, salt, baking powder, and sugar; mix with corn meal. Combine eggs, milk, and shortening; add to dry ingredients; stir just until moistened. Bake in waxed-paper-lined 9-inch square pan in moderately hot oven (400°) about 20 minutes. Makes 16 squares.

Wednesday, September 30, 2026

Simple Cooked Apples and Aunt Annie

Here’s another recipe that’s really more about family. As I and my cousins and classmates have slowly become the elder generation, I’ve been sifting through, transcribing, and annotating recipes written on cards, in notebooks, on scraps of paper tucked into church-ladies’ cookbooks, on the backs of old envelopes. These are mom recipes, grandma recipes, aunt recipes, great-aunt recipes.

It’s been hard to complete this project, because I keep acquiring more of these recipes. I open up another one of their old cookbooks, and another little recipe falls out.

Then there are “recipes” that no one bothered writing down, because they were so standard, so simple, or so memorized they didn’t require it. But as I think back to how we used to eat, and compare it to how we eat today, I find I want to include these dishes.

This post is more about a person than it is about a recipe, and it’s only marginally a recipe, anyway.

This time, we’re featuring Aunt Annie—my great aunt Anna (Eggert) Wilmesherr (1904–1981), who married Emil Wilmesherr (1899–1990) in 1922. Emil was my grandma Clara (Wilmesherr) Renner’s younger brother.

Emil and Annie lived in Washington, Missouri, where his and Clara’s parents, William August and Pauline (Wehmeyer) Wilmesherr, had moved their young family from Kansas in about 1901.

Grandma Renner, though she didn’t have a car and couldn’t drive, still got to see her kin in Washington pretty often, with it only about an hour away on Highway 50. Emil and Annie had nice cars.

Fun fact: Aunt Annie’s sister Ida Eggert (1902–1956) married Clara and Emil’s older brother, Andrew Wilmesherr (1899–1990); they lived in New Haven. Two sisters married two brothers!

With Franklin County a center of the extended Wilmesherr-Wehmeyer-Brinkmeyer-Busekrus family, Emil and Annie often hosted the annual summertime family reunions. Sometimes it was at their house, but later it was held in the basement of the Leslie [now-Zion-no-longer-United] Methodist Church. (That congregation must have split from the mainstream denomination in 2023, but whatever.)

Uncle Emil often made homemade ice cream for the reunions, and when he got too old to make it, he ensured there was plenty of vanilla ice cream from the supermarket (or dairy).

I can picture him, sitting next to the big cylindrical tub of ice cream, professional-quality ice cream scoop in hand, dipping out perfect spheres of ice cream into everyone’s bowls. Between servings, he’d plunge the scoop into a container of hot water, to make the scooping easier. You only had to hold out your bowl to him, and he would fill it, or refill it, smiling, his eyes twinkling. So, so, good.

These reunions were potlucks, of course, so before the ice cream was served, we enjoyed a selection of all kinds of hot dishes, cold dishes, fried chicken, sliced ripe tomatoes, cold cuts and sandwich fixings, Jell-O salads, pies, cookies, and cakes.

While the adults visited, trying to figure out how they were related, and how many cousin-times removed they were, and learning about recent marriages and babies born, we kids visited and revisited the food tables. It was always really hot.

When the family’s formal meeting started, we went outside to play, or carefully explored the church sanctuary above. Being a young pianist, I was amazed with their 1908 pipe organ.

Emil and Annie had fruit trees in their yard, so they often provided bowls, or pies, of fresh peaches and apples.

And here is the “recipe”: one year, I remember that Aunt Annie had served a big bowl full of cooked, cold apples. They were fresh apples (probably Jonathans) from their trees, peeled, cored, and quartered, cooked until perfectly tender, sweetened with a bit of white sugar, chilled, and served in their own juices. Was there a hint of cinnamon? I can’t recall. They were tender, with only enough body to hold their shape just long enough to collapse when you closed your mouth on them.

I recall going back again and again to get more of those icy cold, delicious apples, on that hot day, in that musky church basement. These simple apples blew my mind. Yes, I was pretty young, but I was at an age where I was starting to notice and think about such things.

They weren’t apple pie, apple dumplings, applesauce, or baked apples. I asked Mom about them. “What do you call these?” She said she was pretty sure Aunt Annie had brought them. “Ask her.” So I did.

Aunt Annie kind of laughed her bubbly laugh and shook her head, with its snow-white hair, and told me, “Why, they’re just plain cooked apples, honey! How do you make them? Well, you just cook your apples, like you’re making applesauce, but you don’t mash them up!”

I must’ve expressed to her that I thought they were the best things on the whole potluck. She was flattered, but had to chuckle. She was always kind to us kids. And she had the sweetest smile.

Today I understand her bemusement, since at that point, for all I knew, applesauce was something everyone bought in a can. Only old-fashioned country people, it seemed, made homemade applesauce. But in Aunt Annie’s world, every female probably knew how to make applesauce from scratch by the age of eight. The simplest thing on earth.

I’ve been making them for myself for as long as I’ve had a kitchen. I use a steamer. I don’t turn them into applesauce—you can buy applesauce, right?

But each time I make them, I think of Aunt Annie, and her smile.

Wednesday, September 23, 2026

Grandma Renner's Southern Cornbread

My grandma Clara Renner’s recipe, as my mom typed into her own recipe notebook. Mom said that her Grandma made cornbread frequently.


As usual, although this post is about food, it is also about the connection: my grandma. Therefore, I’m sprinkling in some photos of her, taken by Mom in the 1950s.


A note on the photos: About fifteen years ago, Mom diligently digitized her old slides, but she didn’t clean the slides before scanning. So there are zillions of unfortunate specks and spots. Sue color-corrected some of them for me, but others still retain a pinkish red color shift. She did all she could. Sorry about that.

Better to have imperfect pictures than none at all. Sometimes soft photos have a perfection all their own, you know?


Grandma was born in Kansas and grew up in Washington, Missouri. From the time she was a teen and throughout her adult life, she lived in Jefferson City. She worked hard, raising four children and taking care of her husband and his father during the Great Depression and then World War II. Grandpa worked at the local printing company.


Like I said, Grandma worked hard. She had a garden, she raised rabbits for cash, she took in laundry and ironing for cash. She had to hide her grocery money from Grandpa. (I didn’t learn about Grandpa’s depression and drinking problems until long after he had died.)


Grandma had German heritage; her dad’s grandfather had immigrated to America in 1858, and her mom’s mother had been born in Germany, too. She grew up speaking German in the Lutheran church she attended. (If you struggled to learn the Lutheran Catechism, just imagine learning it in German!)

Unlike my other grandma, who was the daughter of German immigrants, Grandma Renner seemed much less Germanic. Culturally, she was more rural, or more Americanized. Grandma Schroeder would make split pea soup served with rye bread, and Grandma Renner would make ham and bean soup served with cornbread. At Christmas, Grandma Schroeder would make sauerbraten; Grandma Renner would make roast chicken (or turkey, though she greatly preferred chicken) . . . or a plain pot roast.

Or she would grill steaks out in the backyard, basting it with homemade BBQ sauce.


So, I find it interesting that she’d have a recipe for southern cornbread: southern. Most people would just call their cornbread “cornbread,” right?

Therefore, we need to talk about southern cornbread.

First, the sugar. Always the sugar, with those southerners. Can’t have too much of it in the iced tea, but can’t have a speck of it in their cornbread.

There’s a lot made out of the idea that “true” southerners never, ever, ever include sugar with their cornbread. But then, many southerners “admit” that they use “just a titch” of sugar.

Grandma’s recipe includes one tablespoon of sugar for four cups of corn meal and flour. That’s not very much.


I think it’s reasonable to include a small amount of sugar with cornbread in order to correct deficiencies in the sweetness of the cornmeal being used. If it’s super fresh and high quality, it’s probably sweet enough on its own. But if your cornmeal sits around on your shelf, or if it’s been in a warehouse for who knows how long, it might need a little help. In fact, what you bought at the grocery store probably does need a little help.

The overall idea, however, is that southern cornbread is not obviously sweet; it shouldn’t be like cake; it should be sweet only in the sense that corn itself is sweet. It’s a lot like adding a small amount of sugar to a tomato sauce.

Another southern thing is to make cornbread in a cast iron skillet. The old-fashioned technique is to preheat your oven, then heat your well-seasoned iron skillet on the stovetop, mix your batter, dollop some butter or lard into the skillet (which is so hot it immediately starts to sizzle), and right after that, put your batter into the skillet; it sizzles instantly. Then you transfer it into the oven to finish. This way, it develops a buttery, crisp, golden crust on the bottom, which you can make the top by inverting it upside-down onto a serving plate. Or serve out of the skillet, as you prefer.


But I’ll bet my grandma didn’t fuss with that. She wasn’t a southerner, anyway. For goodness’ sakes, her immigrant grandpa had served in the Union Army from 1861 to the end of 1864. And she was a modern midwestern homemaker. I bet she made it in a cake pan or a baking dish, in the oven.


So, what’s better, northern or southern cornbread? Southerners apparently see it in black-and-white: southern style is best, doggone it! Meanwhile, northerners usually don’t get so het up over it.

Me, I prefer to have all the colors in my coloring book. I like both the sweet kind and the unsweet kind. I like cornbread with blueberries, cheese, jalapenos, peanut butter, jam or jelly, split and toasted with butter and caraway (or poppy) seeds—you name it.


And I like corn griddlecakes with sorghum molasses!

As always, I have some comments on the recipe:

First, with its 3-to-1 ratio of cornmeal to flour, it will be dense and rather dry, not delicate and cakelike as in northern cornbread. Cracks will develop on the top, like the Dry Tortugas, or the Nevada Proving Grounds. . . . Rub some butter on the top surface.


This is perfect for crumbling into a bowl and topping with cooked beans and their juices, or with bean soup, or with thin, soupy chili.

As with most quick breads and muffins, mix the drys and wets separately, first; then combine them together.

Grandma’s recipe doesn’t give a pan size, precise temperature, or baking time. I use a 9 x 13 Pyrex baking dish, set the oven at 425 degrees, and start checking it at around 12 minutes; it’s done when it starts turning golden brown on top and a toothpick comes out clean.

  • 3 cups cornmeal
  • 1 cup flour
  • 1 tablespoon sugar
  • 1 teaspoon salt
  • 2 heaping teaspoons baking powder
  • 3 or 4 eggs
  • 2 cups sweet milk
  • 1 tablespoon lard [melted, surely; or melted butter or vegetable oil]

Mix all together and bake in hot oven.


Saturday, June 13, 2026

Aunt Sally's Rhubarb Sauce

This is an awesome, classic jam recipe, for whenever you can get your hands on some fresh rhubarb. Wow, it’s delicious!

In recent years, I’ve been compiling, transcribing, and annotating the trove of recipes I’ve accumulated from all my relatives. This recipe had several iterations, since Mom had a copy, Grandma Renner had a copy, and Great Aunt Lyddie had a copy. Aunt Lyd’s was handwritten and tucked into her copy of Cooking with Faith, the 1975 church-ladies cookbook from her Faith Lutheran church here in Jefferson City. “Sally” in the title is my aunt Sally Renner, my mom’s sister-in-law.

This is made with Jell-O, but it’s definitely supposed to be used like jam. The recipe ends with: “Good on hot rolls.” Or biscuits! Or pancakes and waffles! Or ice cream! Or . . . !

  • 3 c. rhubarb, cut in small pieces
  • 1 c. frozen strawberries, or 1 small can drained, crushed pineapple
  • 2 c. sugar
  • 1 3 oz. pkg. banana-strawberry Jell-O or mixed fruit Jell-O [see below]

Cook rhubarb, strawberries (or pineapple) at a rolling boil for 8–10 minutes. Remove from heat and stir in package of Jell-O. Pour into jars or molds, and chill overnight until set. Can be left, covered, in the refrigerator for a week or more. Good on hot rolls.

Julie’s notes:

  • They don’t make “Mixed Fruit” flavor Jell-O anymore, do they. The strawberry-banana flavor works really well; strawberry Jell-O works fine, too.
  • I’ve used thinly sliced dried pineapple instead of canned, and that works, too.

Wednesday, March 19, 2025

David’s Pancake

Y’all, this is really good. A friend shared this recipe with me back in about 1987, and I had never made it. She was older than me and had a lot of interesting stories from the 1960s and 70s. For years, I have wondered, “Who was David? . . . Probably an old boyfriend of hers. The Vietnam vet?” Finally, I Googled the recipe and realized she must have copied it right out of The New York Times Cookbook, by Craig Claiborne, published in the 1960s. The “David” is David Eyre, who was a food writer and editor for the NYT. The recipe is actually named “David Eyre’s Pancake.” So it wasn’t some groovy, super-talented, 1960s boyfriend of hers. She just copied it out of a book. See how important it is to cite your references?

The recipe card has languished in my recipe files all this time.

Actually, I think I tried to make it once, but it was a disaster because I didn’t know what I was doing, and I didn’t have the proper equipment. I’m surprised I kept the recipe.

Over the past few years, I’ve been compiling and typing old recipes into a big Word document, and (not knowing if this recipe had gotten a fair shake in my kitchen back in the late 1980s) I decided to try it again.

And hey, it’s really good! Another name for this kind of preparation is “Dutch baby.” It’s like a big popover made in a skillet, or like a soufflé. And just like a soufflé, it can go in a sweet or savory direction. You need to pay attention to technique, but it’s not hard. (If I can do it, then anyone can.)

Here’s how I’ve made it into a resounding success.

Equipment: I use an approx. 6-inch diameter (seasoned) iron skillet (it’s heavy, it holds heat, and it’s fine to go into an oven); also, I use our little toaster oven/convection oven, on the convection setting. The little skillet fits perfectly in there. (Or, if you’re making more than one at a time, or using a larger skillet, use an actual oven; but it must be fully preheated.)

So here's the nutshell version: Preheat your oven. Mix the batter. Then, start on the stovetop: heat a couple tablespoons of butter in the skillet (the skillet should be on a pretty hot burner; once the butter foams, and before it turns brown, it’s ready); pour the rather liquid batter into the skillet; then place the skillet into a preheated 425-degree oven and let it cook, undisturbed, for about 15 minutes.

That technique I just wrote? That’s the part I didn’t understand before, but it’s the principle that makes it turn out well.

Here’s what happens: The batter starts cooking as soon as you pour it into the hot-hot pan. Then, during the 15-minute oven time, the pancake cooks and puffs up. With a 6-inch skillet, some of the butter may seep over the side as the pancake rises, but let it. The pancake usually doesn’t quite get entirely solid in the center. I mean, I don’t think you even would want it to get completely “done” in the middle. The edges balloon up and get done faster, and may even get a little crispy. The eggy, custardy, soufflé-like center will deflate when you pull it out of the oven.

You’ve got to eat it hot, right out of its miniature iron skillet. Very cozy. To protect your tabletop, serve it atop a potholder or trivet.

I like sprinkling over it some fresh lemon juice and powdered sugar, which makes the center kind of like lemon curd. It can be a breakfast, lunch, or snack, or possibly a dessert, if you added, say, a sweet fruit compote on top, or chocolate and whipped cream, or whatever. But see the suggestions at the end.

I think this makes one serving, but if you’re eating it with other foods, such as a fruit salad, it could be enough for two. Especially if you make it in a pan larger than a 6-inch skillet . . . but then you need to slice it in half (very unpretty). Better to use individual little skillets.

  • ¼ c. flour
  • ¼ c. milk
  • 1 egg, slightly beaten
  • pinch of nutmeg
  • 2 T. butter
  • 1 T. confectioner’s sugar
  • Juice of ¼ lemon, or jelly, jam, or marmalade

Preheat the oven to 425°F.

In mixing bowl, combine flour, milk, egg, nutmeg. [I would add a pinch of salt, too.] Beat lightly/don’t overbeat. Leave batter a little lumpy.

Melt butter in a 12-inch or smaller skillet with heatproof handle. When butter is hot [foams/stops foaming], pour in the batter. Bake in oven for about 15 minutes, or until golden brown.

Sprinkle confectioner’s sugar and return to oven (to warm it, if desired).

Sprinkle with lemon juice; maybe add more confectioner’s sugar, or jelly, jam, whatever.

Yield: 1 or 2 servings.

Alternate treatments: Instead of lemon juice and powdered sugar, or jelly or jam, you could top it with chocolate or maple syrup, fruit compote, whipped cream, butter-sautéed sliced banana with brown sugar (and maybe a bit of rum) . . . anything you might put on any other pancakes.

But! You can also stir small-diced ham or crumbled bacon and grated cheese into the batter before pouring it into the pan. Or some chopped baby spinach and herbs. Or a duxelles of mushrooms. Or whatever . . . as you would an omelette. Yum!

Wednesday, March 12, 2025

Grandma Schroeder’s Sour Cream Coffee Cake

I can’t believe I haven’t shared this recipe yet! It is a true family favorite. It goes waaaay back. It’s a tangy coffee cake with a center layer of cinnamon and brown sugar; cinnamon and brown sugar are on the top, too. This moist cake is nice as a breakfast or coffee-break treat, but it’s also excellent as a dessert.

Several nearly identical copies of this recipe exist in Grandma Schroeder’s collection. Two of them appear as pictures in this blog post. This is one right here:

Plus, Dad got a copy, and I made a copy of his. This is a really good cake. I’m sharing my version of the recipe, which creams the butter and sugar first, then adds the eggs, then adds the sour cream and vanilla (all the wets) then adds the combined dry ingredients.

I think a few tips are in order. You should have a plan for constructing this cake: you will need to spread half of the sticky batter into a 9 x 9 pan, then sprinkle a crumbly layer of brown sugar, white sugar, and cinnamon on that, then spread the second half of the sticky batter on top of that, before sprinkling again with the sugar-cinnamon mix. This is problematic: the sticky batter is hard to handle and spread, and it can be next to impossible to try to spread the second half of the batter across the first, crumbly layer of cinnamon-sugar. Here are some ideas:

  • If you have an offset spatula, this is a perfect time to use it.
  • Try dipping your spatula in a pitcher or tumbler of warm water to keep batter from sticking to it.
  • Or, just use your immaculately clean, damp hands to pat down and even out the first layer.
  • It’s a good idea to use slightly less batter for the lower layer (it gives you more batter to play with as you try to cover the sugar with the second layer).
  • To apply the second layer of batter, start by doling it out in portions atop the cinnamon-sugar. Then, spread those portions with the spatula or with your hands, joining the blobs together.

Remember, Grandma made this all the time, and she wasn’t fussy. It really doesn’t matter if that middle layer is perfect. The cake is delicious no matter what.

Make sugar mix and set aside:

  • ⅓ cup brown sugar
  • ¼ cup white sugar
  • 1 tsp. cinnamon

Then make the cake batter:

Cream together:

  • 1 cup sugar
  • 1 stick oleo

Beat in:

  • 2 eggs

Then add the rest of the wet ingredients:

  • 1 cup sour cream
  • 1 tsp. vanilla

In a separate bowl, combine the dry ingredients:

  • 2 cup. flour
  • 1 tsp. baking powder
  • 1 tsp. baking soda
  • ½ tsp. salt

Combine the wet and dry ingredients to make the batter.

Pour half the batter into a buttered pan [9 x 9; if you use 9 x 13, it is harder to spread out the two layers]. Sprinkle with half the sugar mixture; pour the remainder of the batter and sprinkle remainder of the sugar on top.

Bake at 350°F for 40 minutes, or until done. [Note that some versions of the recipe have it at 325°F; your oven may vary.]

Monday, February 17, 2025

Aloo Palak Tacos

Rejoice! Today, I present to you: the Aloo Palak Taco!

It’s a tasty, hearty, Indian-inspired vegetarian sandwich.

In the process, I’m also giving you a straight-up recipe for making aloo palak, a north Indian/Punjabi “dry curry” vegetable dish (sabji) of potatoes and spinach, which you can have on its own as part of an Indian-inspired meal, with, say, rice (chawal) plus a sauced/wet curry dish (ones with a lot of sauce or gravy, such as butter chicken or anything-korma), or with a dal (bean/legume dish).

(Here, I serve my aloo palak taco along with a basic masoor dal and white rice. Delicious!)

Not counting the sections for appetizers, salads, and breads/rice, my recipe file of Indian dishes has separate sections for dals (the bean dishes, which are typically a little soupy); “wet curries” (whether with meat or vegetables, these have a kind of “gravy”); and “dry curries” (sabji/sabzi, “dry vegetables”).

Dry curries, or sabji, are vegetable dishes lacking a gravy, though they are usually spiced up really thoroughly. You typically make a masala (say, with oil, onions, ginger, garlic, plus your spices), then add your main ingredient, and cook (carefully, usually at a relatively lower temperature), sprinkling water in the pan only to keep the ingredients from sticking, but not so much as to make the dish “wet.” The masala flavors permeate the main ingredient. You might be familiar with aloo jeera (cumin-flavored potatoes), bhindi masala (okra fried with onions and spices), aloo gobi (potatoes and cauliflower), or bund gobi and mater (cabbage with peas).

If you are not interested in learning how to make your own Indian food, you can simply order a dry curry/sabji from your local Indian restaurant, and use the leftovers from that.

Well, I like to play around with these vegetable dishes, since recipes usually make plenty for leftovers, and they’re already nicely flavored. They make delicious vegetarian sandwiches, burritos, and tacos. They’re good in omelets, too. For big burritos, you can add some leftover rice. For burritos and tacos, I usually add some neutral-flavored cheese, such as mozzarella, Monterey jack, or provolone (sliced or shredded). Having a layer of melty cheese against the burrito or taco tortilla helps give it some structural integrity. Which is so important for hand-held foods.

Which brings us to aloo palak tacos.

Making the tacos is straightforward, if you know how to treat flour tortillas nicely. Whether for burritos or tacos, you need to heat your flour tortillas so they will bend and not break. I use a big, heavy skillet. You might have a griddle or tava. You might need to very lightly oil the surface to make sure the tortilla doesn’t stick. Heat on one side, turn it over, add a layer of cheese, let it get warmed up. Don’t heat the tortilla until crispy, only until pliable. Then add your filling—in this case, a few spoonfuls of reheated leftover aloo palak. Bonus points for garnishing with some chopped fresh tomatoes. Ta-da!

And now, here’s my recipe for aloo palak (potatoes and spinach). It’s based on a recipe I received from Aman and Gurcharan Aulakh, a mother-daughter duo who, in March 2009, taught a series of “Punjabi Home Cooking” classes at the Missouri Botanical Garden. The ingredients are the same, but I’ve tweaked the method a bit from what they told us. (The biggest difference is that they precook the potatoes in a casserole dish in the oven, covered with sliced lemons to prevent browning, while I simply steam the potatoes.)

Aloo Palak

Prepare the two main ingredients:

  • 4 c. peeled and diced potatoes (approx. 1-inch-long rectangles): steam until just done, not mushy, but completely done, and set aside
  • 2 c. frozen chopped spinach: thaw and squeeze out moisture (I thaw in water, then squeeze out in a wire sieve); set aside

Make the masala; note that at any time the ingredients start to stick, sprinkle some water, but not so much water that you make a sauce:

  • 3 T. vegetable oil
  • 1 medium onion, chopped
  • 2 t. minced garlic
  • 1 T. minced ginger

In a wide, heavy-bottom skillet, cook the above until the onions are translucent. Then add the masala spices all at once; lower the heat to prevent burning; sprinkle water as necessary:

  • 1 t. turmeric
  • 1 t. cumin seeds
  • 1 t. black pepper
  • ½ to 1 t. red chili powder (ground) (I use Kashmiri red chili powder, but use whatever ground red chilis you want, or none at all; it’s to your taste)
  • 1⅓ T. ground coriander seed (yes, it’s a lot, but you’ll be glad because this is really good)
  • 1½ t. salt (or to taste; I usually use 1 t., then taste at the end)

After the masala has cooked enough (about five minutes) (you’ll know when, because the oil kind of starts separating out, and it looks and smells like the spices, oils, and onion are all melded), stir in the spinach. Again, you’ll need to sprinkle water to keep it moist. Then add the potatoes and stir gently. Again, sprinkle water if necessary. The potatoes should absorb the flavors of the masala.

Finally, add:

  • 1 T. kasoori methi (dried fenugreek leaves, which you can buy at an international store) (I rub the dried leaves in my hands to break them up a little)

Stir and heat through. Taste for salt.

Wednesday, January 4, 2023

Mark’s Good Old Stuff

It’s not an heirloom recipe, but to me it’s a classic. It helped me survive graduate school. You can file it under “goulash” or “one-dish meals,” but you can also label it “cheap, first-apartment food” or “culinary atrocity number 537.” The major sin here is a ham-handed blending of Italian and Mexican Tex-Mex flavors. The basic idea is to use canned chili, plus other ingredients, as your pasta sauce.

Don’t knock it ’til you’ve tried it.

I have two versions to share. Mark, referenced in the title of the recipe, was the owner of the pet shop I worked at all through college. One version of the recipe amounts to the original notes that I wrote down to the best of my memory, after watching Mark make it as a quick, tasty dinner one night. It will give you an insight into how to approach such a dish as this.

I had never seen Mark cook before, and I don’t think I ever saw him fix any food after this. At work, if we ever had any big projects requiring after-hours labor (like the three times we moved the entire pet store within the mall!) he would reward us, and keep us from going home, by ordering three or four large Domino’s “ExtravagaZZa” pizzas. I remember coming to the pet store for work the morning after a late night, and he and I gnawed on some of the cold pizza still laying on the counter in the back room.

We weren’t very close friends; I mean, he was my boss. I only went to his home a few times, so I can’t speak to the rest of his culinary repertoire. Sure, I’d seen him move a rock the size of a refrigerator, and I knew he was a hockey player and part-time/reserve city police officer—when he wasn’t at the pet store. He was not exactly domestic.

Neither was I, at the time. But I was starting to pay attention to methods and procedures for making tasty foods, so in this case it was like a big brother showing me how easy it was to make “good tasty cheap stuff, and it makes a ton.” He kind of laughed as made it. He hadn’t been in college for a number of years, but had just gotten a divorce, was living in an apartment, and was paying alimony and child support.

So here are my original notes for “Mark’s Good Old Stuff”:

Get some links of Italian sausage, cut it up and fry it in a skillet. In a separate, large saucepan, heat up a can of chili beans. Dump the sausage and grease and all into the beans. Put in some cooked macaroni (elbow or whatever). Did he put in some oregano? A bay leaf? Some green pepper, black olives, onion? Some canned tomato?

And here’s my version, as I eventually developed it into more of a formula. (Or maybe it’s more of a checklist for when you stop by the grocery store on your way home from work.)

8 oz. rotini pasta (or elbows, or shells, or whatever)
Italian sausage (2 to 4 big links; remove casing)
green bell pepper (chopped) (optional)
onion (chopped) (optional)
1 can corn (whole kernels) (drained)
1 can chili with beans
1 can chopped tomatoes (optional)
1 can black olives (California olives) (drained and chopped)

Cook the pasta until al dente; don’t overcook it. While it’s cooking, prepare the rest of the stuff. Use a big, heavy skillet. Fry the sausage; chop it up while it’s cooking. Remove some of the grease (or not). Add the green bell pepper and onion, if using, and fry those, too. Add the corn to the sausage in the skillet, and keep heating. Then add the chili and tomatoes (if using), and heat through. Add the black olives last, because they’re kind of delicate. Then combine the drained pasta with the “stuff.” Heat through.

Optional: serve garnished with sour cream or shredded cheese, such as cheddar, mozzarella, or parmesan. If you really want to dress it up, top it with chopped cilantro or green onions.

Note: clearly, you can adjust it however you wish. I like it with hot Italian sausage and spicy chili.

Finally, this actually tastes better the next day or so after you make it. So this makes a ton, and you do want to have leftovers.

Friday, December 30, 2022

24-Hour Salad (Overnight Fruit Salad)

This recipe is from Alvina Crawford. She and her husband, Fred, were my parents’ dear neighbors across the street on Isherwood. For many years, she would make overnight salads for friends and family at Christmastime. She’d make so many, over so many days, she’d freeze them so she could deliver them all on the same day.

So this is a holiday recipe for me.

I can replay the scene in my memory: our doorbell would ring, we’d go down the stairs to the front door, open it, and there’d be Mrs. Crawford, holding a big container full of salad. It would be a reused plastic ice cream tub, or a disposable aluminum foil casserole container. Her warm, mild voice, with its notes of rural North Dakota and Scandinavian ancestry. Her Christmas greetings—you could hear the smile in her voice. . . . We’d give her and Mr. Crawford a big platter of our homemade Christmas cookies, covered with foil, decorated with a Christmas bow.

There are lots of versions of this dish online; it’s a classic 1950s salad that doubles as a dessert. In this way, it is a lot like a Jell-O dish: “Is it a salad, or a dessert?” How can you tell? If it’s a salad, you serve it on a lettuce leaf—that makes it a salad instead of a dessert. As a dessert, served in a pretty bowl, it’s great with cookies. After a hearty Christmas meal, you might not want a heavy piece of pie or pudding. A fluffy fruit dessert like this is just the ticket! It’s perfect with Christmas cookies!

Grandma Renner made overnight salad, too. I’m not sure if anyone has her recipe. To the best of our memory, she used large, round, juicy red grapes instead of canned sweet cherries. In those days, you couldn’t get seedless red grapes, so each grape needed to be sliced in half, and the seeds picked out with the knife tip. Tedious; a labor of love. If you use seedless grapes (and why not?), slice them in half in memory of the labors of the past.

Other recipes, by the way, use things like drained canned mandarin orange slices, or real orange or tangerine slices, chopped bananas, and nuts. (Though if you’re making it for me, please don’t add nuts.) This recipe is a lot like an ambrosia salad, which has shredded, sweetened coconut, citrus, and pineapple.

My tips and comments are at the end.

24-Hour Salad (Overnight Salad)

Recipe adapted from Alvina Crawford

Dressing ingredients:

1 c. half and half
4 egg yolks, well-beaten
1 T. butter
1/4 t. salt
1/2 cup sugar
2 cups (1 pint) heavy/whipping cream

Make the dressing first (see notes at end, however). Use a double boiler, or use a heavy saucepan and heat gently. Heat the half and half first. Then add the next ingredients (except for the whipping cream), adding the eggs slowly and carefully so they don’t curdle. Cook, stirring, until definitely thickened. Then, set it aside to cool. This is a good time to prepare the fruit ingredients.

Fruit ingredients:

2 cans (20 oz.) sliced pineapple, drained and sliced (see notes below)
1 can (17 oz.) sweet cherries, drained and halved (or further chopped) [or whole]
[optional: large red grapes, halved and seeded if necessary]
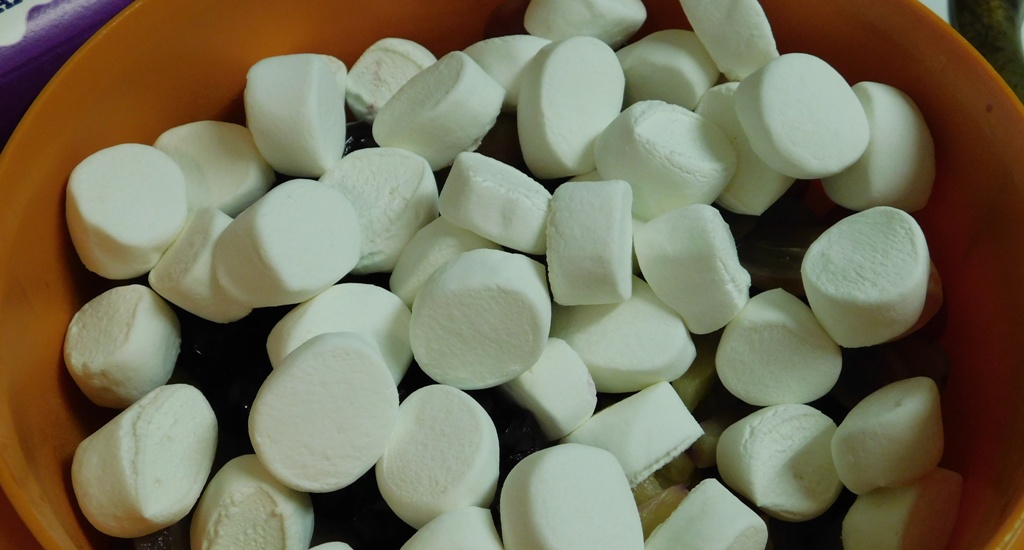
1/2 lb. (24 count) regular-size marshmallows, quartered (or halved)
juice of half a lemon (fold in with the rest)

When fruit ingredients are ready, and collected into a big bowl, and when dressing custard is cooled, whip the heavy/whipping cream until well-whipped. Add the custard/dressing to the fruits, then fold in the whipping cream. Let it stand in the refrigerator for 24 hours (this is an important step).

Serve on lettuce, as a salad, or in dessert dishes as a dessert.

Yield: about 2½ quarts.

Julie’s notes:

Mrs. Crawford noted that, in order to divide the labor, she sometimes would cut up the fruit the day before, then make the custard and whipped cream the second day. “It doesn’t seem like such a long process when divided up.”

Why do you need to buy canned sliced pineapple, and then cut it into smaller pieces? Why not just buy pineapple tidbits? . . . Well, do what you want, but you get prettier pieces, and fewer little blobs of pineapple fragments, if you cut them yourself with a nice sharp knife. (Your knives are sharp, right?)

Also, as I mentioned above, you can freeze this and give it to people frozen; they can decide when to thaw it and enjoy it.

This recipe dates back to the days before they made "mini marshmallows." So you have to buy "regular" marshmallows and cut them! Okay, use mini marshmallows if you want, but quartered or halved "regular" marshmallows are much more fun to eat.

How do you know when the custard is thickened? . . . You will know; it may take a while, but when it thickens, it will happen quickly, and you'll know.

Finally, regarding the canned fruits: in the 1950s, all the canned fruits were in heavy syrup, so that’s the kind I suggest. But use what you want. Although not overly sweet, this isn’t a low-calorie dessert, so avoiding heavy-syrup in the pineapple probably won’t make a big difference.

And what can you do with the syrup you’ve drained off? Here’s an idea: put it in a saucepan, add sugar, maybe also a cinnamon stick, and simmer to reduce it to a bona fide syrup. With the syrup/juice from the canned sweet cherries, the syrup will be pretty purple. You can use this syrup for pancakes! Or, you can add brandy to the syrup and put other canned fruits in it: brandied fruits; great on ice cream!