Showing posts with label grandma recipes. Show all posts

Wednesday, March 12, 2025

Grandma Schroeder’s Sour Cream Coffee Cake

I can’t believe I haven’t shared this recipe yet! It is a true family favorite. It goes waaaay back. It’s a tangy coffee cake with a center layer of cinnamon and brown sugar; cinnamon and brown sugar are on the top, too. This moist cake is nice as a breakfast or coffee-break treat, but it’s also excellent as a dessert.

Several nearly identical copies of this recipe exist in Grandma Schroeder’s collection. Two of them appear as pictures in this blog post. This is one right here:

Plus, Dad got a copy, and I made a copy of his. This is a really good cake. I’m sharing my version of the recipe, which creams the butter and sugar first, then adds the eggs, then adds the sour cream and vanilla (all the wets) then adds the combined dry ingredients.

I think a few tips are in order. You should have a plan for constructing this cake: you will need to spread half of the sticky batter into a 9 x 9 pan, then sprinkle a crumbly layer of brown sugar, white sugar, and cinnamon on that, then spread the second half of the sticky batter on top of that, before sprinkling again with the sugar-cinnamon mix. This is problematic: the sticky batter is hard to handle and spread, and it can be next to impossible to try to spread the second half of the batter across the first, crumbly layer of cinnamon-sugar. Here are some ideas:

  • If you have an offset spatula, this is a perfect time to use it.
  • Try dipping your spatula in a pitcher or tumbler of warm water to keep batter from sticking to it.
  • Or, just use your immaculately clean, damp hands to pat down and even out the first layer.
  • It’s a good idea to use slightly less batter for the lower layer (it gives you more batter to play with as you try to cover the sugar with the second layer).
  • To apply the second layer of batter, start by doling it out in portions atop the cinnamon-sugar. Then, spread those portions with the spatula or with your hands, joining the blobs together.

Remember, Grandma made this all the time, and she wasn’t fussy. It really doesn’t matter if that middle layer is perfect. The cake is delicious no matter what.

Make sugar mix and set aside:

  • ⅓ cup brown sugar
  • ¼ cup white sugar
  • 1 tsp. cinnamon

Then make the cake batter:

Cream together:

  • 1 cup sugar
  • 1 stick oleo

Beat in:

  • 2 eggs

Then add the rest of the wet ingredients:

  • 1 cup sour cream
  • 1 tsp. vanilla

In a separate bowl, combine the dry ingredients:

  • 2 cup. flour
  • 1 tsp. baking powder
  • 1 tsp. baking soda
  • ½ tsp. salt

Combine the wet and dry ingredients to make the batter.

Pour half the batter into a buttered pan [9 x 9; if you use 9 x 13, it is harder to spread out the two layers]. Sprinkle with half the sugar mixture; pour the remainder of the batter and sprinkle remainder of the sugar on top.

Bake at 350°F for 40 minutes, or until done. [Note that some versions of the recipe have it at 325°F; your oven may vary.]

Thursday, November 16, 2023

Grandma Renner’s Apple and Raisin Stuffing

Only a week before Thanksgiving! Have you decided on all your recipes yet? I’d like to recommend my Grandma Renner’s Apple and Raisin Stuffing!

This may be Germanic, or it may not. It is, however, THE BEST DRESSING for Thanksgiving turkey. Everyone in the Renner family agrees!

Seriously, it’s an old-fashioned favorite, and not just with my family, either. I’ve got nothing against Stove Top stuffing (though it often “tastes of box.”) But it can’t hold a candle to homemade. And the sweet-savory combination of apples, onions, raisins, and celery is just what poultry wants, in the fall.

I’m actually providing you with four slightly different renditions of it. Because it’s a stuffing, it’s not rocket science. Each family member who has made it has altered it slightly, and I find that intensely interesting. I doubt that even Grandma made it the same way all the time.

So here is what I present below:

  1. The recipe that I’ve transcribed from a handwritten copy by my grandma, Clara Renner.
  2. The same recipe as Grandma’s, but with comments and suggestions by me, and presented in a more standard recipe format (I suggest you use this one, but of course I’m biased).
  3. A version of the recipe apparently handwritten by Grandma, that had been tucked into one of her sister’s cookbooks.

  4. My mom’s version of the recipe, from Mom’s recipe cards.
  5. My Aunt Sally’s handwritten version of the recipe—which my cousin David uses.

It’s interesting to note that Grandma Renner didn’t care very much for turkey, so she much preferred to have chicken at Thanksgiving instead. And yeah, we often had chicken at Thanksgiving. This stuffing is great with both!

“Dressing for Turkey”: Clara Renner’s Stuffing

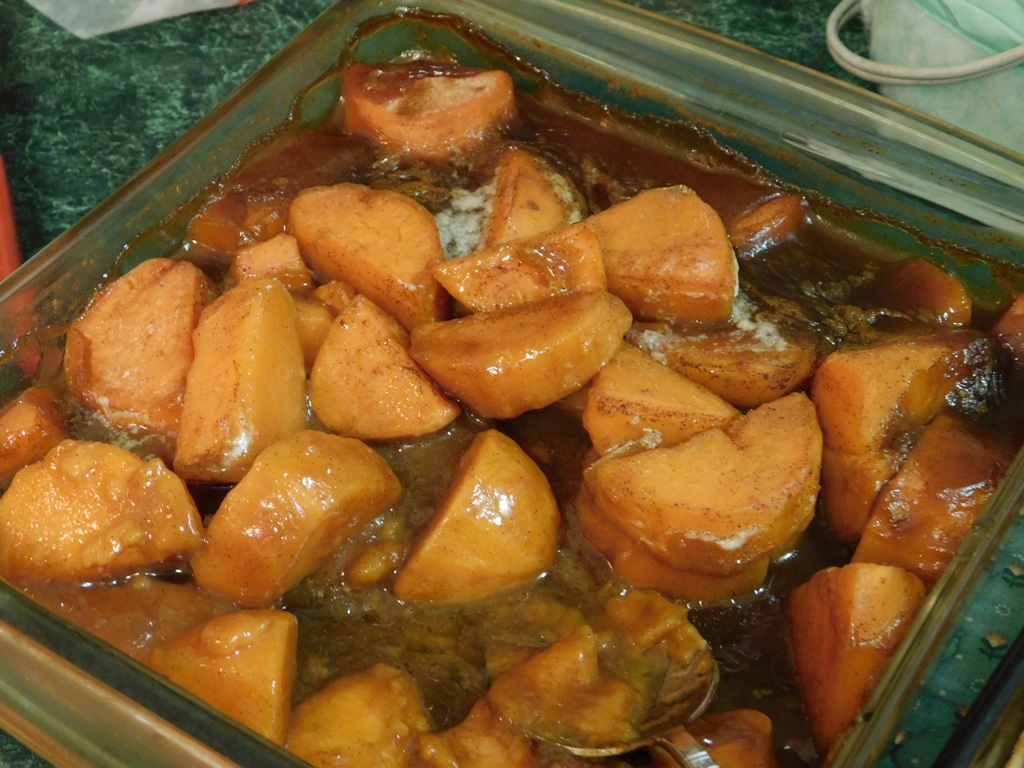
1 loaf bread cut into cubes and toasted in oven [...] then put in large mixing bowl or pan. Cut up about 4 stalks celery, 1 large onion, 3 apples sliced as for pies, 1 cup raisins, cover with enough water so as not to burn and cook this until almost tender, sprinkle with black pepper and a little poultry seasoning about the same amount as pepper and add about 1 tablespoon salt, pour this over the bread crumbs and add 2 unbeaten eggs and mix well, do not pack dressing in fowl too tight. Put some of the dressing [...] top of chicken. If you have any of the dressing left over, spoon or ladle some of the juice out of the bottom of the baking pan when the poultry is about done and stir this juice with the left over dressing and bake in one of your Pyrex baking dishes with lid on, take the lid off when about done to brown the top a bit.

_____

When baking any kind of fowl sprinkle the inside and outside with salt, pepper and poultry seasoning then put in baking pan and add a cup of water in bottom of pan to help to keep it moist. It is best to bake a hen at 325 for about 2½ hrs, then uncover and bake to brown on all sides until tender.

Edited Version of the Above (Julie Schroeder, presumptuous editor)

1 loaf bread [e.g., country white] cut into [½ to ¾ inch] cubes and toasted in oven [yes, until they turn golden brown]
4 stalks celery, chopped [I’d use the tender inside parts, with leaves]
1 large onion, chopped [white or yellow]
3 apples [peeled and] sliced as for pies [Jonathan was Grandma Renner’s go-to apple for pies; I think Granny Smith or other firm, tart, flavorful baking apple would work well, too]
1 cup raisins
water [or chicken or turkey stock, or liquid from cooking giblets; or milk, per Sally Renner’s version]
black pepper
poultry seasoning [such as McCormick’s, which is a blend of thyme, sage, marjoram, rosemary, black pepper, and nutmeg]
1 tablespoon salt
2 unbeaten eggs [lightly beaten, no doubt; apparently can be omitted, per Pat Schroeder’s version]

[You can make all of the stuffing/dressing in a baking dish, instead of stuffing it into the fowl. To my recollection, no one actually stuffed the turkey or chicken from the 1970s and on. People were concerned about it not getting cooked through and being a health hazard.]

Spread toasted bread cubes into large baking dish [such as a 9 x 13 inch baking pan] [and set aside].

In a saucepan or skillet, mix together celery, onion, apples, and raisins; cover with [or just “add”?] enough water [or stock] to keep from burning, and cook until almost tender. [OR: I suggest using a stick of margarine or butter, in a frying pan, to sauté the celery, onion, raisins, and apples; see other versions of this recipe.] Add black pepper, poultry seasoning, and salt. [Use plenty of seasonings, but take into account the saltiness of the water, stock, or other liquid you will use.]

Combine vegetable mixture and eggs [if using]; pour onto bread cubes in baking dish, and mix well. Adjust moisture with [stock or] poultry juices [or milk or whatever]. Bake at 350, covered, until about done, then remove lid to allow top to brown.

“Clara’s Apple and Raisin Dressing”

This version was on a piece of note paper stuck in Great Aunt Lyd’s copy of Cooking with Faith (the ca. 1970 cookbook of Faith Lutheran Church, Jefferson City). I think it’s in Grandma Renner’s handwriting. Aunt Lyd was Grandma’s younger sister. Notice that this version doesn’t use eggs.

Cut up a large loaf of bread into squares and toast, put in big container. Peel and slice 4 jonathan apples, 4 big stems of celery, 1 large or 2 medium size onions, then add a heaping cup of raisins. Put into skillet 1 whole stick margarine then add these 4 things and cook a little until about tender, then pour into that 2 cans Campbell’s chicken broth, sprinkle a little salt and pepper over this and a little poultry seasoning and stir, then pour over the toasted bread crumbs, if it isn’t moist enough to dampen all the bread add a little water.

“Mom’s Dressing”

From Pat Schroeder, so “Mom” is Clara Renner. So this is another version of Clara Renner’s apple and raisin poultry stuffing. As Grandma grew older, Pat took on more of the Thanksgiving cooking duties, and she often prepped the dressing at home in Columbia, the day before Thanksgiving, or on Thanksgiving morning. Then she brought it to Grandma’s house to finish cooking. Pat’s quantity adjustments are in brackets.

Cube and toast 1 loaf of bread.
Peel and cut up 5 [3] apples
Peel and cut up 2 [1] large onions
Cut up 4 to 6 sticks of celery
1 cup raisins

In fry pan, 1 stick margarine. Sauté onion, apple, celery, and raisins until tender. Add 2 cans undiluted chicken broth. Add salt and pepper—let it cool a little. Then pour over and mix with bread crumbs.

[This would be put into a 9 x 13 inch baking dish (or spread around the turkey in the pan and the rest placed in a smaller baking dish), and cooked, covered, in a medium oven, until heated through; then the cover would be removed and the mixture allowed to brown and dry a bit. If using aluminum foil as a cover, I suggest spraying its bottom side lightly with PAM so it won’t stick to the top of the dressing.]

[Note that this version does not include eggs. In my opinion, the recipe is fine without eggs. Nor does it include poultry seasoning, though presumably poultry seasoning would be used on the fowl. —JS]

German Apple Dressing

This version of Clara Renner’s poultry stuffing/dressing is from Sally Renner, her daughter-in-law who lived in Wyoming. As her note at the end of the recipe says, it was her husband, Elwood’s favorite. So this is the version that my cousin David uses, since his mom gave him this recipe. If anyone loves this stuffing more than me, it might be David. He makes it every year. He usually cooks it inside the turkey, too.

Note that Sally recommends using milk for moisture, or a combination of milk and giblet-cooking water.

She also does not specify sautéing or otherwise cooking the celery, onions, apples, and raisins before combining them with the bread. In fact, you add the vegetable components to the dry bread mixture the night before; they cook as they’re in the bird. Or the dish.

Also, the recipe makes a smaller quantity of stuffing than the previous two, using a small loaf of bread, medium (not large) onion, only 2 apples, only ½ cup raisins, etc.

My comments in the recipe are in square brackets —JS.

1 small loaf of bread, toasted on a baking sheet until dry and lightly browned [sliced, then toasted in the oven; David uses a toaster to toast the bread slices].

1 med. sized onion, chopped
½ cup chopped celery and leaves
2 med. sized Jonathan or Winesap apples, pared and cored to make 3 cups chopped
½ cup raisins

Cut the toasted bread into cubes and salt and pepper to taste.

I then put this in the refrigerator to season overnight. [So: the seasoned, toasted bread cubes, chopped onion, celery, and apples, and raisins, all get mixed together and sit overnight.]

In the morning, take out and add:
2 eggs, lightly beaten,
2 cups milk [see below regarding combination of milk and giblet-cooking water]
½ cup melted oleo or butter

If you have boiled the giblets to put in gravy, the liquid from them may also be used instead of 2 cups milk, [so, for example,] use 1 cup milk and 1 cup liquid from giblets. You want the bread mixture to be soft, as too dry [of a] mixture will make the stuffing hard and dry after being baked. Pack loosely into turkey or chicken.

This is the recipe from Mom Renner, and was Elwood’s favorite. If you like you can add:
1/4 tsp. ground sage
1/4 tsp. poultry seasoning

Sunday, December 18, 2022

Jar of Goodness 12.18.22: Heirloom Christmas Cookies

. . . The weekly virtual “gratitude jar.”

This week, I’m expressing thanks for heirloom Christmas cookie recipes.

“These are the cookies of my people.”

I could go on and on about how strongly I feel about our precious family Christmas cookie recipes, but I’d rather just talk about the reasons why these connections are so strong.

But first, honestly, do I love these cookies the best? I sure didn’t when I was a child. I grew up accustomed to sweets that were, well, sweet, like candy, or cookies that are sugary or chocolaty. Each Christmas, when I was confronted with the old-fashioned and Germanic cookies of my forebears, I was rather let down. Dates, raisins, and candied fruits are a different kind of sweet than chocolate chips and Oreo “stuf.” Brown sugar, molasses, and sorghum are also different from white sugar. A lot of it’s the difference between sucrose and fructose. Nuts? They aren’t hardly sweet at all. Finally, when I was a child, I found assertive spices challenging. It’s not that I didn’t like spices—but when a cookie like a pfeffernüsse presented me with a punchy, bewildering blend of cinnamon, anise, cloves, ginger, cardamom, and/or nutmeg, it just seemed “weird.”

So you can imagine my less-than-enthusiastic response to biting into a billy goat cookie, full of dates and black walnuts, when I thought I had picked up a chocolate chip cookie. They do look a lot alike. They taste very different. So I learned to hesitate, my hand hovering over the cookie tray. I learned to carefully inspect my choices before making a commitment to any.

And this is why cookie trays, during my childhood, always included kid-friendly choices. My brother and I learned to scope out the animal cookies (that is, sugar cookies cut into animal and Christmas-themed shapes such as pine trees, bells, stars, and angels, always with straight-ahead icing on them). We also snarfed up the good ol’ chocolate chippers, the snickerdoodles, and the like. Mild flavors; Rice Krispies treats; spritz cookies. Cookies a kid can count on!

But it’s not like I wouldn’t eat the old-fashioned, Germanic cookies. Springerles, I thought, were pretty good, albeit often tough to chew (I didn’t drink coffee, so I didn’t discover the joys of dunking until much later). Lebkuchen, especially with a glaze and decorated with sprinkles, or with half of a candied cherry pressed into the glaze, weren’t too bad, even though the candied fruit was sort of “meh.” Billy goats were tasty, as long as you didn’t have your heart set on it being a chocolate chip cookie.

And so on. My brother and I ate the Germanic favorites, but like the sauerbraten and red cabbage we had only a few times a year (always at Grandma’s), they were “weird.” They were German things, things our school chums in Columbia, whose surnames were English like Wilson and Smith, didn’t have a clue about. The cookies their moms offered us were just “regular” cookies.

And soon enough, we realized our family’s Christmas cookies were special. Everyone who was older, our parents and uncles and aunts, and everyone older than they, oohed and aahed over them: “Ooh, yum, you made springerles! They’re so beautiful! I’ve got to have one of them!” They wouldn’t have gushed so much if it was, say, oatmeal-raisin cookies or peanut butter cookies, because those were everyday cookies; they weren’t special.

By the time I was a teenager, I was hooked on these cookies. Like the Schroeder Weinachtspyramide, I knew they were special to my family and other ethnic Germans. I never cooked, but I knew these required some special skills to make. I was grateful for my grandmas, my mom, my aunts, and the other ladies who made them. When I lived in Arizona and Montana, my grandmas’ abilities were waning. Grandma Renner had dementia; Grandma Schroeder had lost most of her vision. (Where did their springerle rollers or presses end up? I don’t know.)

Uncle Richard had always doled out his lebkuchen for months after Christmas, keeping a coffee can full of them in his conservation-agent patrol car. Shivering, he’d nibble on leppies and sip from his coffee thermos on his late-night stakeouts for catching deer poachers.

He ultimately refrained from eating the last bite of his last lebkuchen made by his mother; he put a tiny eyescrew in it and dipped it in varnish or polyurethane. It’s preserved and it has his bite marks on it. He made a necklace out of it—a totem—which he wears during holiday get-togethers: “The last bite of my mom’s last leppie.”

So yeah, I started looking for the recipes.

Since then I’ve gotten them pretty much figured out. There’s been a lot of trial-and-error, since it was too late for me to lean on my grandmas for advice. But food memories, it turns out, can be acute, so I’ve had a lot of help and encouragement.

The sense of smell and taste are strongly linked to memory and emotion. That’s why certain scents evoke such nostalgia—like the smell of freshly cut green grass in spring, or the first whiff of a wood fire on a crisp, early winter evening.

With the winter holidays so linked with family and spiritual celebrations, and with holiday foods repeated so many years, it only ingrains and strengthens the many associations of those flavors and smells. So when you smell those special cookies baking, each year the memories and layers of meaning accumulate.

It’s about so much more than the cookies. They’re just a trigger, the portal, the crystal ball, the talisman. They link me to my family, my ancestors, to a continent I barely know. They link me to fifty years of memories, some sad, but nearly all sweet. They invoke a mini meditation, a reverie, a quick portal into another dimension. They have power.

Any other time of year, I’ll make other kinds of cookies (recently, I’ve been partial to hermits and “pride of Iowa” cookies, for instance). But it’s my pleasure and honor to make family Christmas cookies and then share nearly all of them.

I didn’t start this. Ancestors who traveled across the Atlantic Ocean brought their holiday recipes with them; they couldn’t bear to have Christmas without them. . . . And who am I to break the chain?

Friday, December 2, 2022

Notes on Grandma Renner's Billie Goat Cookies

I’ve written about Billie Goats, also spelled Billy Goat Cookies, before. But it’s time for a more nuanced version of the instructions. Look, no matter how you make them, they’ll be delicious. But I’ve been taking notes every year, so I can get the shape and texture just right. Until now, it’s been hit-or-miss. But I think I’ve got the techniques figured out, now. (As Chef John says, “Never let the food win.”) By golly.

So yes, there's a recipe at the end of this post.

A true, enduring gift from my grandma Clara Renner, these cookies take the strong, separately distinctive flavors of brown sugar, cinnamon, black walnuts, and dates and combine them into a new flavor I can only call “Billie Goat.” It’s a genuine meld; the combination is much greater than the sum of its parts. If you don’t like one of the ingredients, don’t rule out these cookies, because each flavor is tempered and transformed by the others. This is one of the best cookies anyone can make, in my opinion.

And for us, it’s a must-have for the Christmas cookie tray.

I have used this combination of brown sugar, cinnamon, dates, and black walnuts in other recipes, and I’ve found they have the same profound, synergistic effect, where they meld into a new, milder, but very unique flavor. I think of it as “Billie Goat seasoning.” I use this combination in my bran muffins, for example. You could also apply it to a bowl of oatmeal, or use it in pancake batter or a quick bread.

Grandma Renner said these are called “Billie Goats” because they are lumpy and have little points that stuck out, like a goat. (This is why the shape and the texture of the dates is important; read on.) I don’t know why Grandma spelled it “Billie” instead of “Billy.” Grandma Renner, her sister, Lydia Meyer, and their friends apparently all started making Billie Goats about the same time.

Billie Goats/Billy Goats are in a family of similar drop cookies that were really popular among mothers in the 1930s and 40s. This was a generation of moms who were keenly conscious of their role as household managers. In school, their “domestic science” classes taught them to be faithful guardians of their family’s health and good stewards of the family food budget. Vitamins were a new discovery with their generation. These women wanted to pack maximum nutrition into the foods they made, including their children’s after-school snacks—while being very economical (first, because of the Great Depression; next, rationing during World War II).

So, instead of sugar cookies or candies, they made these proto-health-food snacks, using nuts, plus raisins, dates, and/or currants, and sweetening with surprisingly small amounts of brown sugar (some recipes call for a combination of brown and white). Other cookies in this group include “hermits” and “rocks”; oatmeal-raisin cookies are also close relatives. Look for all these recipes in old cookbooks and church ladies’ cookbooks. The names “billy goats” and “rocks” both apparently refer to the chunky, knobby look of these cookies. I don’t know how “hermits” got named.

Some notes about texture and form, since I’ve had some time to figure these out. They’ll taste great no matter what you do, but the goal is to have a chewy, cakelike inside, and a lumpy, chunky shape. So here’s a discussion of challenges, and my “pro tips.”

For generations, most American cooks could only get Dromedary brand dates, which were apparently Deglet Noor dates. They were packed tightly in cellophane (this was before plastic), stuffed into cardboard boxes, and, after languishing in a warehouse or on grocery shelves, they were as tough as shoe leather. Clipping them with kitchen shears, as Grandma’s recipe instructs, would literally hurt your scissors hand. (Grandma’s kitchen shears were stainless steel, dull old things; you know the type—the ones with the rounded “claws” for opening bottles at the base of the red-painted, hard metal handles. The base of my thumb still hurts, just thinking of them. This was way before “Fiskars” scissors were available!)

So billy goat cookies, being a midcentury recipe, were developed using the ingredients that, at that time, were available to most people: dried-up dates. The cooking softened them, but not to the point where they lost a distinctive, chewy, chunky presence.

Today, the Dromedary brand seems to have gone out of business, and you just cannot buy dry, hard dates like them; instead, they are all moist and tender, either packed in plastic or shipped absolutely fresh. This is actually a good thing, but it presents a problem for replicating this cookie’s texture, since moist dates tend to dissolve into gooey molasses during baking, producing a flat, uniformly chewy cookie, instead of distinct, chunky, jagged lumps of chewy dates and nuts in a cakey, rounded matrix of dough.

I’ve learned to replicate the type of dates Grandma had by purchasing them (Deglet Noors) a few weeks ahead of baking, clipping them in the prescribed herringbone pattern while they’re still soft (which is a much easier task, now), spreading these out on cookie sheets, and letting them sit (under wax paper) in a quiet place while they dry. The house isn’t at all humid in November. Or, you can put them in the oven warmed only by the pilot light. Or you can try a dehydrator. An alternative might be to try to find one of the so-called bread dates (varieties such as Thoories that are sold rather dry, dry enough you can carry them in your pocket)—but those might lack sweetness. Also, I think it’s cheaper and easier to use regular Dole (or whatever) brand Deglet Noors, cut them, and let them dry. That seems the best way to replicate the texture and flavor of old-fashioned Dromedary dates.

Another point about texture: These cookies have caused me more vexation than any others, except perhaps when I was first figuring out springerles. If you only make a cookie once a year, it’s hard to fine-tune the recipe! My Billie Goats recipe card is full of penciled-in notes: “try doing _____ next time.” You don’t want the cookies to be so soft they spread out, but you don’t want them crunchy or hard. How to get that cakey, chewy texture, and chunky look? Here are some key tips:

  • Use a 50/50 combination of margarine and butter-flavored Crisco. Real butter does make them taste better, but it complicates the texture; the cookies turn out drier, less moist. Save your butter for some other recipe.
  • Pack the flour; forget the rule about spooning fluffed-up flour into your measuring cup and leveling it off with a knife. It turns out Grandma R used her measuring cups as scoops: swipe the cup through the flour, like you’re using a dip net to fish something out of water. You can level it off if you want, or just kind of shake off the excess, but you need to pretty much pack the flour into the cups.
  • Let the dough sit overnight in the refrigerator or on an unheated sunporch. The flour will absorb the liquids and be easier to work.
  • . . . But the dough will still be sticky and hard to handle. Put on some happy music. Use parchment-lined cookie sheets. Try dabbing the dough into little rounds with two spoons, or (if you haven’t much patience for the spoon method) use your fingertips to pinch off bits of dough (put some water on your hands so it doesn’t stick so bad; even then, you’ll have to clean your hands and start again several times).
  • I tend to make smallish cookies, because I figure twenty-first-century people would rather select six different morsels from the tray than settle on just two huge cookies. Big cookies are a joy, but variety is the spice of life. Also, with smaller cookies, a single batch of dough goes farther. A 1¼-inch blob of dough, slightly flattened before cooking, produces about a 1½-inch diameter cookie. Back in the day, Mom and Grandma’s cookies tended to end up about 2 to 2½ inches in diameter. Different sizes account for the difference in cooking time; smaller cookies cook faster.
  • Do a single tray of cookies first and see how they turn out. These shouldn’t flatten very much. If they spread out flat, you may have to add a bit more flour to the dough, or you might need to adjust the size of the cookies.
  • Finally, don’t overcook these, or they will be too hard. Mom says this was a principal criticism Grandma R had about her sister, Lydia’s billy goats: “she bakes them too long, and they get too hard.” (I’ve heard this criticism plenty, too.)
  • But if they come out kind of hard, don’t panic. Seal them in a tin, with the layers of cookies divided by wax paper, and take half of a tart apple, wrap it loosely in wax paper, and nestle it in the tin with the cookies. After a week or so, you’ll discover the cookies have softened and developed a je ne sais quoi in terms of flavor.

. . . Does all this sound too hard? Please don’t be put off by these tips; it’s all stuff I’ve learned the hard way, and I’m sharing it here, so you have a super-duper head start!

Finally, again, you can’t really ruin these. They’ll taste great regardless of the texture and shape.

Billie Goats/Billy Goat Cookies

1½ c. brown sugar
1 c. butter [Pat S. uses margarine, sometimes butter-flavor Crisco; I use half margarine and half butter-flavor Crisco; real butter tastes good, but then the texture will be off]
-----------Cream together butter and sugar.

3 eggs: beat whites [till light; use a hand mixer or whisk] and [then] add [whisk in] yolks

1 level tsp. baking soda dissolved in
¼ c. lukewarm-to-hot water

1 Tbs. cinnamon
1 tsp. vanilla
1 c. black walnuts [chopped]
1 lb. clipped dates [using a scissors, clip whole, pitted dates in an alternating herringbone pattern; the idea is to have them big enough to kind of “poke out” of the cookies; if you buy pre-chopped dates, it’s okay, but the pieces are too small to achieve the characteristic lumpy look.]
2½ c. flour [basically pack it]

Make the cookie dough [let it sit overnight in the fridge] and drop it onto [parchment-lined] cookie sheets by small spoonfuls. Bake in a moderate (ca. 350-degree) oven like you would other cookies, about 8–11 minutes. [Don’t overcook; they should be rather chewy and cakey inside.]

Makes about 100 cookies.

Thursday, November 24, 2022

Florence Biffle’s Sweet Potato Bake

Happy Thanksgiving!

This fantastic yet simple recipe, titled “Sweet Potato Bake,” is from Mrs. Florence M. Biffle (1914–2006), who was a member of Faith Lutheran Church in Jefferson City. I recently found her obituary online. I’ll bet my Great Aunt Lydia Meyer knew her well, since she was a longtime member of the same church and was also a quilter. Also, I’ll bet my Grandma Schroeder and Great Aunt Minnie Bartlett new Mrs. Biffle, too, since they were all longtime members of Jefferson City’s Hawthorn Garden Club.

I never knew Mrs. Biffle, but I feel I could easily have known her. There’s a good chance I was in the same room with her at some point, and just never knew it. Anyway, I’m grateful to her for this recipe, and for these small connections between our worlds.

I noticed she was buried out at Hawthorn Memorial Gardens cemetery, so in a few weeks when I'm out decorating Grandma and Grandpa Renner's grave, I'll see if I can find Mr. and Mrs. Biffle.

This recipe was on p. 49 of Cooking with Faith: Favorite Recipes of Faith Lutheran Church Women, Jefferson City, Missouri, by the Faith Lutheran Ladies Guild, Jefferson City, Missouri [ca. 1975].

This is an interesting, fruity-glazed alternative to the standard (and I think tiresome) sweet potato casseroles made with brown sugar, pecans, and marshmallows, so common at the Thanksgiving table. I think you’ll really like this for a change of pace.

I’ll offer my tips and suggestions after the recipe.

Sweet Potato Bake

Cook 4 to 6 sweet potatoes until almost tender. Skin and cut to desired size (chunks). Place in a casserole dish.

Combine and bring to a boil:

1 c. apricot nectar
2 T. orange juice concentrate (not diluted)
½ c. brown sugar
1½ T. cornstarch
1 t. salt
½ t. cinnamon
2 T. butter
½ c. water

Pour over the potatoes and bake 30 to 40 minutes at 350°F.

Julie’s notes:

You can peel the sweet potatoes and cut them into chunks, then cook them in gently boiling water if you don’t want to bake them. I have also steamed them, and that works, too. But don’t overcook the potatoes; remember they will be cooking for another half hour in the oven.

I use a 9 x 9 Pyrex baking dish. You will cook it uncovered, so what begins as a liquid dressing reduces to a gooey glaze over the potatoes. Pull them out of the oven when the sauce is gooey enough for your taste.

The dressing mixes up most easily if you first combine all the dry ingredients together before adding them to the liquid.

Kern’s Apricot Nectar, which is no doubt what Mrs. Biffle had in mind, used to be available at all the grocery stores around here, but I haven’t seen it in years. I think the company’s out of business. There’s another brand called Jumex, but I’ve never seen it except online. I’ll bet it’s something to look for at an international store. Both seem to contain high fructose corn syrup and other less-than-desirable ingredients. But it’s no problem if you can’t find apricot nectar. Just take some canned apricots and some of their juice and puree it in a food processor or bullet blender, so it gets to the consistency of a thick “nectar” type juice. You only need a cup. A bonus of doing it this way is that you can decide how much corn syrup to include (since you are selecting your can of apricots—in heavy syrup, light syrup, or whatever). You can even puree the apricot pieces with just water, if you want.

There's no reason you couldn't use dried apricots, simmered in water until they're perfectly soft, then process those in a bullet blender or run them through a food mill, to make them into a liquid puree. I suppose that would be healthier. But I think using canned apricots with their corn syrup is more authentic to the midcentury church ladies cooking style.

Do-ahead tip: You can put the peeled, precooked potato chunks and the uncooked sauce into the casserole dish, dotting the butter on top, covered with plastic wrap, and refrigerate overnight. Or out on your unheated sunporch, if it’s cool enough. Finish it in the oven the next day.

Sunday, August 15, 2021

Grandma Schroeder’s Peach Kuchen Recipe

Here is the venerable kuchen recipe from my grandma Edna Schroeder. It’s a family favorite; every time I make it, all the Schroeder-clan people ooh and ahh. I grew up understanding that a kuchen was a special, special thing.

From my youngest age, I remember our family going to visit Grandma in Jeff City, and if she’d made a kuchen, there’d be excitement (which Grandma herself helped to generate): “Look what I made for dessert!” “Ooh, a kuchen! What kind is it?” “Peach!” “Oooh, a peach kuchen, I can’t wait!” . . . If it was a larger family get-together, each group to arrive would go through the same ritual, so I often heard it numerous times in a day, as my uncle and aunt and cousins arrived, as Marie arrived, as anyone else came. “Look, Mom made a kuchen!” “What kind?” “Peach!” “Oh, boy!”

Apparently Grandma never wrote down the recipe, but fortunately my Aunt Carole made notes one day as Grandma was making it. I’m not much of a baker, but I’ve been plugging away trying to master this recipe for a few decades (hard to master when I don’t make it very often). But even when I’m not personally satisfied with the texture, it has always tasted incredibly good.

First, let us review our German. In German, Kuchen means “cake” or “something baked,” so the word applies to a huge variety of Germanic baked goodies. Think of how we use the word “cake” for a wide range of dishes—pancakes, birthday cake, cheesecake, crabcakes, sponge cake, coffee cake, angel food cake, pound cake, fruit cake . . . This explains why your German grandma’s kuchen is nothing like my German grandma’s kuchen.

Well, Grandma Schroeder’s kuchen is like this: it has a shortbread-cookie-like “crust,” which is topped with fresh fruit lubricated with a gooey custard matrix and baked; when that is fairly set, it is topped with meringue and browned. (The meringue topping explains why the type of fruit is always a mystery; you can’t tell what kind of fruit was used just by looking at it.)

This is a wonderful way to celebrate whatever kind of fruit is in season. Right now, the peaches are perfect. Lovely, sweet, divine peaches. So we’re making a peach kuchen in this post.

A typical serving of this dessert (or coffee cake) is a 3 x 3 inch square (so, 9 servings in a 9 x 9 inch baking dish). I often stretch this out, using more fruit and meringue, to a 9 x 13 inch size, for groups.

The biggest challenge I usually have with this recipe is getting the center of the fruit/custard portion to bake firm enough to have meringue spread over it, without also overcooking the crust. This recipe can (and should) use a variety of seasonal fruits, so the juiciness can vary a lot. Therefore, I advise reducing the amount of custard for juicy fruits like peaches—just drizzle it on, but don’t force yourself to pour it all on, if it will make a pool of “soup” in the middle. I have the best results with sliced apples (apple kuchen)—where the fruits are somewhat dry.

The final result should have, at the base, about ½ to ¾ inch crust/cake; then about ¾ to 1 inch of fruit, within a gooey matrix of custard; then, on top, about ¾ to 1 inch of meringue. The corner pieces will have the most cake; the center pieces will be the gooiest.

Grandma made all kinds of kuchens, depending on what was fresh—Concord grapes, plums, blueberries, peaches, and combinations of these. Dad says Grandma never deseeded her Concords; she just put them in whole and let people chew on the seeds(!) My own variations have included a banana kuchen with peanut butter in the crust (recipe is here), and a kuchen with sliced tart apples plus big golden raisins that I’d soaked overnight in vanilla–infused cognac. (Grandma would’ve loved that one!)

I have seen what are apparently very “authentic” German recipes for plum kuchens that skip the meringue and are much flatter and more spread out. These are made in 9 x 13 baking dishes or cookie sheets. The plums are washed, halved, pitted, and placed on the crust in a decorative, overlapping pattern. Some type of glaze (sometimes heated-up jam) is drizzled or brushed over the top, then it’s baked, and that’s that. You can find several recipes for this plum kuchen (Pflaumenkuchen) online. You can certainly do that with this recipe, simply omitting the meringue and making a wider, flatter dish.

The base of the kuchen, in many recipes, is made with a sweet yeast dough (similar to that used for cinnamon rolls), but that’s not the way my grandma made it.

By the way, we always assumed that Grandma’s kuchen was a recipe she learned from her mother, who immigrated from Germany, but I found a very similar recipe in a cookbook that my Grandma used in her high school Domestic Science (home ec) class. Indeed: that particular page of her book (p. 412) is firmly adhered to the facing page by hundred-year-old, dried-up cooking goo. (I didn’t dare try to peel the pages apart; instead, I found a scanned version of the book online.) Some of the many kuchen dough recipes and variations in that book are very similar, too. So perhaps Grandma learned this recipe from her high school cooking text, The Settlement Cook Book, 11th ed., 1921. (Digitized versions of several editions of this book are online at the Hathi Trust; here’s a link to the 1921 edition.)

So here you go, another family secret unveiled . . .

Grandma Schroeder’s Peach Kuchen Recipe

Overall ingredients list:

  • 2 + ¼ cups flour (divided)
  • 2 tsp. baking powder
  • pinch salt
  • ½ + ½ + ½ cup sugar (divided)
  • ¾ stick butter
  • 4 eggs (divided: 1 beaten; the other 3 separated)
  • ½ + ⅓ cup milk (divided)
  • 2–3 cups fresh peaches, sliced (or other fruit)
  • ½ tsp. vanilla (optional)
  • ¼ tsp. cream of tartar

1. Make the dough. Combine the following:

  • 2 c. flour
  • 2 tsp. baking powder
  • pinch salt
  • ½ cup sugar
  • ¾ stick butter (it helps to use a pastry cutter and rather softened butter)

. . . then, add 1 beaten egg and enough milk (about ½ cup) to make it the consistency of cookie dough (e.g., rather stiff and sticky).

Spread the dough in the bottom and slightly up the sides of a 9 x 9 inch baking dish (Pyrex is good); with the dough so sticky, I spread it with moistened hands.

2. Make the custard. Separate the 3 eggs (reserving whites for meringue); beat together the 3 yolks, add ⅓ cup milk, ½ cup sugar, and about ¼ cup flour. This is for the custard matrix for fruit: depending on the juiciness of the fruit, consider making less, or using less milk, or including a whole egg instead of a couple of the yolks. (I usually make the full amount of custard; then whatever isn’t drizzled over the fruit in the kuchen I pour over additional/extra fruit in a couple of single-serving ramekins and cook in a bain-marie as a fruit custard.)

3. Fill the kuchen. Spread approx. 2–3 cups fresh fruit (sliced peaches, or whatever) evenly over the dough. It helps to gently press the fruit down into the kuchen; the crumb will raise and puff up, and the fruit will add moisture to the crumb. Drizzle custard on top of fruit. (See previous comment about not using too much custard—you don’t want it too full of liquid in the center.)

4. Bake at 350F for about 20–30 minutes. Watch it, because ovens vary; it’s done when the dough is cooked (browns) and the custard is relatively firm. Sometimes it never quite firms up due to the juices; it usually firms nicely with apples but rarely with grapes, blueberries, or peaches.

5. Make the meringue. This is a standard meringue recipe, as I don’t have any indication about how Grandma made her meringue. Beat the 3 room-temperature egg whites on medium with ½ tsp. vanilla (if using) and ¼ tsp. cream of tartar for about a minute (until soft peaks form); then switch to high speed and gradually add up to about ½ cup sugar; beat for about 4 minutes, or until shiny and stiff peaks form. If making meringue seems like kind of a pain, remember that Grandma used a manual rotary eggbeater.

6. Finish the kuchen. You’re in the home stretch, now. Spread the meringue carefully on top; dabbing it into artistic shapes, and return it to the oven to brown the top. Let it cool gradually. Store it in the refrigerator.

If it falls apart when you cut it, who cares? It's delicious! And I'm sure you'll love it.

. . . My people do.

Sunday, January 12, 2020

Aunt Lyd’s Goulash

Time for a retro recipe!

Great Aunt Lydia Meyer provided this recipe about 1984, though I’ll bet she’d been making it for years. Aunt Lyd, Grandma Renner’s younger sister, who lived off of West McCarty, on Hamlin Street, in one of those nifty 1920s/1930s homes with the tall, steep gable soaring over the front door.

Her husband, Adolf, was a letter carrier for the post office—a physical job, for sure—and they had two robust, busy sons, so with all that activity and appetite surrounding her, she knew how to make satisfying meals in a hurry. And inexpensively.

Since there were lots and lots of women in the same situation, the following dish is hardly unique. Most of us who grew up in the middle twentieth century have memories of eating some kind of gloppy hamburger-based stew called “goulash.” It didn’t help that it sounded a bit like “galoshes,” which puts one in mind of mud, slush, and other sloppy things that collect on the ground. But honestly, we loved it.

The concept of “goulash,” although somehow loosely connected to an ancestral idea in the Old World (e.g., Hungary), constitutes a central branch of a wide variety of midcentury American tomatoey, ground-hamburger-and vegetable, one-dish meals called “goulash.” In Sue’s family, when her mom produced a goulash dish, Mr. Ferber would chuckle and call it (affectionately, but no doubt to Mrs. Ferber’s chagrin) “slumgullion.”

If we’re critical, and we’re being honest, this is not food to savor, except occasionally as a retro recipe—a way for us midcentury babies to plumb childhood memories of suppertime and potlucks. Mostly, it’s valuable as a quick, tasty way to feed a bunch of hungry people using things you have on hand.

Which means: “mom food,” or “church lady food.” (With the recent cold, snowy weather, I made this recipe as a meal for my parents and brother.)

Also, since we’re being critical, we owe a salute to our moms for improvising such tasty meals, on a shoestring, using what was in the freezer and cupboard. Boxed Hamburger Helper would soon come along and tell them, “you don’t need to mess with all that stuff; just brown some hamburger, add water, and stir in our box of sodium and dried-up things.” And compared to that, goulash seems like a meal made with actual love and care and creativity.

As a hot stew, it’s also perfect for wintertime eating.

I’m sure you can find lots of similar recipes, maybe even better ones, online, but here’s Aunt Lydie’s version. My suggestions follow the recipe.

Aunt Lyd’s Goulash

Brown ½ pound of hamburger; add ¼ cup chopped onion, and ½ cup chopped celery. Cook until tender. Then add 1 package of frozen succotash, 1 can tomato soup, 1 tsp. sugar, and pepper and salt to taste, and a little chili powder, and a little green pepper.

Simmer for 45 minutes.

Makes 4 servings.


Suggestions and notes:

  • “Package of frozen succotash”: in the past, frozen vegetables only came in ca. 10 oz. boxes. Maybe you can still find 10 oz. boxes of frozen succotash, but to replicate this dish, you may have to buy frozen lima beans and corn and measure out about 5 oz. of each. You could also use canned instead of frozen.
  • “1 can tomato soup”: this would have been a can of condensed Campbell’s tomato soup, used in the condensed form.
  • Obviously, the variations are endless.
  • Finally, if you add a little Italian herbal seasoning, or oregano, it would probably be even more tasty. Just sayin’.

Fun fact: I had to look up the spelling for slumgullion for this post!

Wednesday, January 20, 2016

The Mützens of Elm Street: Mützen, Müzen, Mutzens, Mootsens

By any other name (or spelling!), a mützen would still taste as sweet . . .


Of course, it’s about much more than a delicious “donut”; it’s about our tradition of eating them. The pictures in this and the previous post hopefully give you a sense of how we associate them with fun and family.


I described our tradition of eating mützens on New Year’s Eve in my previous post, and I encourage you to read it first if you haven’t already.

But a quick recap: Apparently my grandma Edna Schroeder learned to make mützens from her mother, Wilhelmine Caroline Thomas, who grew up in the German-Dutch border region. In Holland, there is a similar recipe called Olle bollen (“oil balls”). In Germany, mützen are associated with Fastnacht (Mardi Gras) celebrations. Apparently the Thomases traditionally made them at New Year’s Eve.


I hesitate to call this “Grandma Schroeder’s Mützen Recipe,” because it’s only an approximation. Grandma Schroeder never seemed to use a written recipe for mützens; she generally cooked “by feel,” but for years we all knew that mützens were incredibly special, so some of us had made notes, following Grandma around the kitchen, during various years. Fortunately, then, I had someplace to start when Sue and I first tried to make them in 1997.

Particularly, we had three different versions of Grandma Schroeder’s “recipe” that were all written by different people at different times: My aunt Carole Schroeder, my mom, Pat Schroeder, and my brother, Paul, who was a kid at the time (his notes are especially entertaining). All these recipe notes were made approximately in the middle 1970s.


These recipes all differed (greatly!) in the relative amounts of various ingredients, particularly in the amount of flour. (Of course, flour is the one variable that changes the most, depending on humidity, how you spoon or scoop it out, etc.; you will just have to develop a feel for how much flour is sufficient for obtaining the “gukky” consistency young Paul described in his notes for the recipe.) Because of the meticulousness of her notes, we mostly followed my mom’s version.

Mützens

Small batch; good for about ten people, with plenty of leftovers to send home with them for breakfast.


Scald 3 cups milk, with
  • 1/2 stick of margarine (or butter), and
  • 3/4 cup sugar, and
  • some salt.

Let cool. (Allow time for this to happen; it can’t be too hot, or it will kill the yeast when you add it.)

--------------------------------------------------------------

Dissolve 1 package of dry yeast with
  • a little warm water (ca. 1/4 cup), and
  • 1/2 tsp. sugar.
This will get foamy.

--------------------------------------------------------------

Slightly beat 2 eggs, and add
  • about 1 tsp. of ground mace to them. (Mace quantity varies depending on how strong or fresh your mace is. It is probably better to add a little too much than not enough.)

--------------------------------------------------------------

When the milk part is cool enough, combine the milk, yeast, and eggs mixtures in a big mixer bowl. Using a hand mixer, start adding flour gradually, about a 1/2 cup at a time. (Have plenty of flour on hand; you will need approximately 4–6 cups.) The batter should be sticky and thick enough to not be runny. It should be cohesive enough so you’ll be able later to nudge it off the spoon in globs or blobs and not in runny strings.

Fold in the currants: About one cup, more or less, to taste.

--------------------------------------------------------------

Set the dough aside in a big bowl someplace warm and preferably humid. Cover with a damp clean dish towel. We put it in our oven, whose pilot light keeps it nice and warm. In the past, with small batches, we have heated a Pyrex measuring cup with water in it in the microwave to make it humid, then put the bowl of batter in beside it. With the microwave door shut, it made a nice environment for the yeast to work.

---------------------------------------------------------------

Let rise until double in bulk; then stir it down and let it rise again. You can repeat the rising and “punching down” until it’s time to fry! Thus, you can prepare the dough in late afternoon before your guests arrive. Just check on it every once in a while and punch it down.


Frying. Grandma used a big pot on a burner, but we recommend using a FryDaddy or other frying appliance that will keep the grease at a constant temperature. We started using one of these in 2006 or 2007, and it makes deep-frying a lot easier. Or you can do it the old-fashioned way:

Get a big pot. A thermometer will help, if you have one that can clip to the edge of the pot. You’ll want the Crisco to be between 350 and 375 degrees F. You’ll need about 2–3 inches of hot grease so the batter can bob around, so you will probably need an entire (large-sized) can of Crisco.

Nudge the batter off of a spoon and into the hot grease, taking care not to splash. Remember, the dough will puff up a lot as the mützens cook. So smaller blobs are better: They will cook faster and more evenly, and they will serve more people; larger blobs will become “belly bombs,” especially if they are still doughy in the center.

It’s good to cut into one of the first ones to make sure it’s cooking right.

Drain mützens on paper towels or paper grocery sacks. (I hoard paper grocery sacks in December for this purpose!)

Take one large paper grocery sack and dump a bunch of powdered sugar in the bottom.

Batch by batch (about 6 at a time), shake the hot, drained mützens in the paper sack with the powdered sugar in the time-honored tradition. This is a great job for young people. Make sure they understand they need to roll the top of the bag and hold it closed while shaking it! Watch for holes developing in the corners; but then, hey, resign yourself to having powdered sugar dust everywhere. It always makes me smile the morning after.

Of course, you could try sprinkling on the powered sugar with a sifter or sieve. But what fun is that?


We have an enormous circular platter that we pile the finished mützens onto. At midnight (after we’re done outside making all kinds of noise), we carry the platter of mützens into the living room for everyone to enjoy with their champagne.

Happy New Year!


Mützens: Doubled Recipe for a Larger Group

This is a thumbnail recipe; see above version for important notes regarding dough consistency, etc.

1. Scald together, and then let cool:

  • 6 c. milk
  • 1 stick margarine
  • 1 1/2 c. sugar
  • some salt

2. Dissolve together:

  • 2 packages dry yeast
  • ca. 1/2 cup warm water
  • 1 tsp. sugar

3. Slightly beat together:

  • 4 eggs
  • 2 tsp. [actually, more like 2 Tbsp.; see note above] ground mace

4. When milk is cool enough, combine all of the above. Then starting adding the flour, 1/2 cup at a time, to desired consistency. Fold in currants.

  • ca. 6–8 cups flour, added gradually
  • ca. 1 box of Zante currants

5. Set aside in warm moist place to rise; punch down occasionally, until time to fry.

6. Fry in hot grease, ca. 350–375 degrees F; drain on paper grocery sacks; shake with powdered sugar; serve immediately.

  • Crisco
  • powdered sugar


Hey, if you make these, I hope you’ll let me know how they turn out!


Finally: This is a very special recipe that belongs to my family. Please do not copy it and pretend that it’s yours, or republish it without crediting my blog and this post. Thanks!


Monday, July 27, 2015

Grandma Renner’s Chili Sauce

Here’s another retro recipe for you! But first, I need to make a confession: I didn’t like this when I was a kid, when I had the opportunity to eat the chili sauce Grandma Renner herself had made! Now, of course, I kick myself for being such a little nitwit.

But I long ago copied the recipe from Mom’s collection, thinking I’d make it someday. But I had to go through some kind of phase where “real” chili sauces were viewed as somehow “better” than my own grandmother’s.

Maybe it’s a labeling problem: this really isn’t a true chili sauce. There aren’t any actual chilis in it! Bell peppers, green and red, but mostly it’s tomatoes. It’s a spicy tomato sauce. It’s basically chunky ketchup. There’s no heat to it at all.

If you look in church-lady cookbooks from the mid-twentieth century, you’ll find scads of recipes for “chili sauce” that are just like this: really, a tomato relish.

For our little Fourth of July feast, I decided to offer an alternative relish for our burgers, so I made up some of this. And boy, howdy—it’s pretty darned good!

You usually think of something piquant, tangy, tomatoey, and just . . . sharp tasting. Sharply tomatoey. But this has a good combination of flavors, vinegar, sugar.

Naturally, I didn’t follow the instructions to the letter. First, I made the “mistake” of not knowing that one is always supposed to blanch, peel, and deseed tomatoes used for sauce! What a nincompoop I am. (However, I do know that nutrients and flavor are in the skin and seeds, so unless I’m told not to, I tend to keep them in.)


After the initial hour of simmering, I could tell I’d have to run it through my food mill, and that would change the texture from how Grandma used to make it. But okay—I remember Grandma’s chili sauce being chunky and fairly watery, and I wanted mine to be more like a sauce—thicker, more ketchupy. So my “mistake” turned out to be a boon.

Grandma’s recipe calls for “red peppers,” too—I had to ask my mom what Grandma might have used. I mean, any hint of the word chili, and I’m inclined to use red chili peppers, those small, thin-skinned little firecrackers, like cayenne. But no, Mom told me it was more like a red bell pepper. Read: sweet red pepper.

I quartered Grandma’s recipe, since it was a maiden voyage, but next time, I’ll make a full batch and process it. Here’s why:


—It goes on nearly everything. Hamburgers, hot dogs, mac and cheese, baked potatoes, you name it—anything you’d maybe put ketchup on. I mean, just a hot dog or hamburger, a bun, and this stuff—and wow.

—Check this out: open a jar of sauerkraut, pull out enough kraut for however many servings you need, rinse and drain it, sprinkle caraway seeds on it, then spoon some of this relish in. Stir it up, then heat it. A microwave will do. Feed it to people who say they don’t like sauerkraut, and see if they don’t make an exception. Great as a side with brats and potatoes.

—You can use it as a salsa—a chip dip. Stir it in with yogurt or sour cream.

—Mix it with mayo and use as a dressing base for a pasta salad.

For this maiden voyage, I used greenhouse tomatoes—but I’ll bet it will be exponentially better made with red ripe summertime tomatoes! You might want to try it, too.

Here’s the recipe. Notes in [brackets] are by me.

Chilli Sauce
By Clara Renner

16 cups tomatoes (about large pot full)
6 sweet peppers [green bell peppers]
8 big onions [Mom said Grandma would’ve used yellow ones]

—Cook for 2 hours.
—Then, add and cook 1 hour longer:

2 cups vinegar [Grandma would have used apple cider vinegar]
3 red peppers [Mom said Grandma would’ve used sweet ones, such as red bell peppers]
2 Tbsp. mixed spices [Mom said these are pickling spices; I used McCormick, which must have some cinnamon in it—very delicious!]
2 cups sugar
1 Tbsp. salt
1 Tbsp. celery seed

—For catsup or sauce, use 1/2 tsp. ground red pepper, which you can use instead of 3 red peppers [okay, I added a little chili powder—the spice-blend kind you’d use for making chili—and I also used the red peppers as well.]


If you’re like me and you want to just try it out, below is the quartered recipe I used. I made an effort to cook it down.

Reduced Recipe
(makes about 3 pints)

4 cups tomatoes (approx. 4-5 tomatoes), chopped (next time, I’ll blanch and peel the skins off of them)
1 1/2 green bell peppers, chopped
2 regular-sized yellow onions, chopped [I figure what was a “large” onion in Grandma’s day is probably what we’d call a “medium.”]

—Cook for 2 hours in a heavy-based pan.
—Then, add the following and cook for 1 more hour or until as thick as you want:

1/2 cup apple cider vinegar
4 sweet red peppers (shape and size of jalapenos—but they’re sweet)
1/2 T. pickling spices
1/2 cup sugar
1/4 T. salt
1/4 T. celery seed

—Adjust seasonings to taste. I’m sure I added more pickling spices and celery seed, thinking my containers of them were rather old. I also added a pinch or so of chili powder.
—When it’s about as thick as you want, run it through a food mill if you want it to have a more homogenous texture.
—I didn’t preserve mine, but this recipe was born to be canned.